Clipping

How to Detect and Eliminate Clipping

Clipping is a technical term that refers to something you’ll want to avoid: amplitude levels that are too high for the digital audio system to encode. Such high levels often cause a nasty sounding digital distortion. Unfortunately, it’s easy for clipping to happen in Reason. Any project that has several tracks playing at once might have it. Fortunately, it’s also simple to control clipping within Reason. This webpage tells you how.

To avoid clipping in Reason, you first need to know two things: where clipping can occur, and how to watch and listen for clipping. This watching and listening is called monitoring. Reason has several different meters you can use to monitor the audio signal. It’s also important to know how to interpret what the meters show.

The Hardware Interface and the Big Meter

There is only one place where clipping can happen in Reason: the Hardware Interface. This is where audio enters Reason (if you are recording audio) or leaves Reason (if you are listening to your sequence play back). It is always present at the top of your rack.

Reason hardware interface device, showing individual input and output levels

Because clipping can occur only at the Hardware Interface, you don’t need to worry if the meters on mixer input channels, individual devices, or effects “go into the red.” That is okay, and doesn’t indicate clipping.

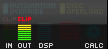
Look at the lower panel of the Hardware Interface, at the channel meters. There are three main sections: the Sampling Input (orange label), the Audio Input (gray label), and the Audio Output (blue label). Since we aren’t recording into Reason, just playing back, it’s the Audio Output level that we need to monitor.

DO THIS: Click the button under Audio Output channels 1 and 2 so that it turns red, as shown in the illustration above. This means you will monitor those channels. (Now flip the rack around and look at the back. Notice that the L and R Master Outs in the Master Section are patched to the Audio Output channels 1 and 2. These connections are made automatically when you open a Reason song file. Because you selected Audio Output channels 1 and 2, you are now monitoring your entire mix. Flip the rack back around to view the front.)

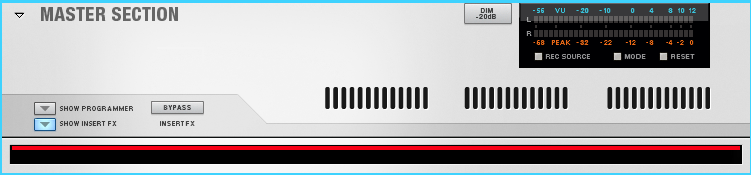
Notice that, when you select Audio Output channels 1 and 2, the Big Meter opens just below the Hardware Interface. This is Reason’s largest and most detailed meter. The signal level for the left audio channel (L) is shown above that for the right audio channel (R). Note the word CLIP just to the right of the L and R. If the red lights above and below the word CLIP turn on, as in the picture below, your sequence has clipping. These clip lights will stay lit until you press the RESET button.

Reason hardware interface device, showing clipping on the Big Meter

Note that it’s okay for the meters to show red. That doesn’t mean the sequence is clipping. It’s only when the clip lights turn on that clipping is present.

Section Heading

Reason has three other meters you can use to monitor clipping:

  • Transport Panel’s audio level meter
    The advantage of this simple meter is that it’s very easy to see: it’s almost always visible when you are playing a sequence. If the sequence clips, the word CLIP will momentarily light up in red. But it won’t stay lit, which means that if this meter is the only one you use, you should watch it very carefully.

    Reason output level meter in the Transport Panel, showing clipping

  • Main Mixer’s Master Fader meter
    Like the Big Meter, this meter has a clip indicator — two lights that normally are dark, but that will light up when there is clipping — at the very top of the meter. Note the reset button, which clears the clipping indicators.

    Reason master output meter and fader in the Main Mixer

  • Rack’s Master Section meter
    This meter appears just under the Hardware Interface. It is very similar to the meter in the Main Mixer’s Master Fader, and their reset buttons are connected.

How to fix clipping

  1. Mix your sequence, adjusting levels, panning, EQ, effects, including dynamics effects like compression, until it sounds good to you.
  2. Be sure to turn the metronome click OFF. The metronome click can cause clipping indicators to light.
  3. Reset all clipping indicators, to clear them.
  4. To monitor your sequence for clipping, play through your sequence from beginning to end. The Big Meter is the best meter to use, but others are okay too.
  5. If meters indicate that clipping has occurred, add the MClass Maximizer as an insert effect on the Master Section:
    1. In the rack’s Master Section, click the Show Insert FX button so that it turns blue. A black line appears below the Master Section. Click that black line; part of it will turn red.

      Reason Master Section from the rack, showing the empty insert effects slot

    2. Control-click or right-click on the black and red line, and from the menu that appears, choose Studio Effects > MClass Maximizer.
    3. The Maximizer will appear below the Master Section. It will be inset within the rack, to show that it’s an insert effect. (To verify that it’s connected as an insert, turn the rack around.)
    4. On the front of the Maximizer, turn on the 4ms LOOK AHEAD button.
    5. Reset all clipping indicators, to clear them.
    6. Play your sequence again from beginning to end. You should not see any clipping.

Note that if you wish to use other MClass devices on the Master Section (for example, the MClass Equalizer or Compressor), the Maximizer should be the last device in the signal chain.