Mixer Automation

Reason: Automating the Main Mixer

Mixer automation is the process of changing parameter values, such as volume and pan, during the course of a sequence. The changes can be instantaneous, gradual, or somewhere in between.

In any sequencer, there are two ways to automate a parameter: recording and drawing.

Recording Automation

To quickly create automation data, it is sometimes easiest to record your knob-turning or fader-pulling action in real time. You can fine-tune this data later. This is a good way of doing it, because you can try out your moves while playing the sequence to hear the effect of the changes before recording them.

The steps below show how to automate a fader in the Main Mixer, but the procedure is the same for any knobs in the Main Mixer.

  1. Right-click directly on the fader you want to control, and choose Edit Automation from the context menu.

    This creates in the Sequencer a track and lane for the Mix Channel device associate with this fader.

    NOTE: This is different from automating synthesizer/sampler device parameters. These use lanes that are in the same sequencer track as the note lanes for that device. When you automate the mix for a device, that automation goes into a separate track.

    When recording mix automation, be sure to select the track for the appropriate Mix Channel device, so that your automation changes will go into that track.

  2. Set the Position Pointer in the Sequencer to an appropriate place, and press Record.
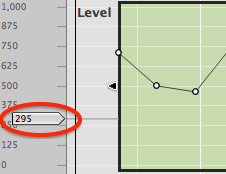
  3. Drag the fader around. These changes in level will appear in a new automation clip in the lane created in step 1.
  4. That’s it! When you play this part of the sequence, you’ll see the fader move by itself.

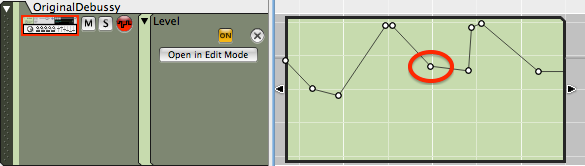
Notice that the automation lane has an Automation Lane On button (the right-most circle below). You can use this to suspend automation temporarily. If the button is off, the automation will not play back. Every track has a Record Enable Parameter Automation button (the left-most circle below). This must be on (red) before you can record automation into the track.

Record-enable and play-enable automation in the Reason sequencer

Drawing Automation

If you simply want to draw some data without recording it, you can do that in the Sequencer.

  1. Right-click directly on the fader you want to control, and choose Edit Automation from the context menu.
  2. Using the pencil tool, click in the newly-created automation lane in the Sequencer, and drag out a box. This is an empty clip that will contain your automation.
  3. With the arrow tool, double-click this clip to open it for editing.

    Remember that holding down the command key lets you switch quickly between the arrow and pencil tools.

  4. Use the pencil tool to draw a curve into the clip. If you draw past the edge of the clip, the clip will expand to contain the shape you draw.

Editing Automation Data

Here are some tips for editing automation data in the Sequencer.

  • Double-click the clip in the Sequencer to see the individual data handles (white dots) and the straight lines connecting them.

    Drawing automation data in the Reason sequencer

  • Using the arrow tool, click and drag a handle to move it.
  • To change an automation data point more precisely, click on a white dot to select it, then change its numerical value in the Inspector above.
  • To delete an automation data point, select it, then press the delete key.
  • Adjusting the default parameter value in the automation edit view

    For even more detailed editing, press the Open in Edit Mode button (in the picture above). This lets you adjust the default value of the fader that is used when there is no clip with data in it. The value is shown in a moveable indicator in the left margin of the graph. In the example below, the fader value will be 295 whenever none of the green clips are playing.