

To set the tempo and time signature for an entire sequence, you just edit the numbers in the Transport Panel at the bottom of the screen. But what if you want the tempo or meter to change in the middle of a sequence?
Reason: Changing Tempo and Meter
Tempo Changes
Here’s how to enter tempo changes in Reason.
Think of this method as automating the beats-per-minute value (that is, the metronome marking). It’s very similar to other types of automation we have already covered (automating Redrum’s pattern grid, automating instrument parameters for Exercise C, automating an input channel’s volume and pan in the Main Mixer).
All of the instructions below refer to Reason’s Sequencer window.
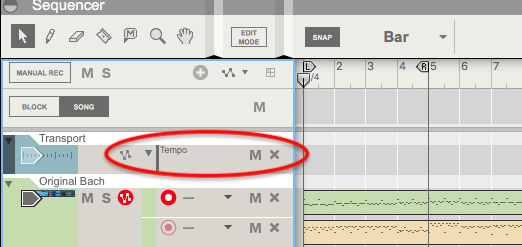
- Right-click or control-click on the BPM (beats-per-minute)
value. Two things happen: the BPM value is then outlined in
pink,
and the Transport track’s lane is now labeled “Tempo.”
- Using the pencil tool, click and drag in the tempo lane to create an empty clip.
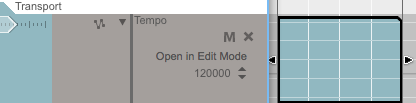
- With the arrow tool, double-click the clip to edit
it. You could draw a tempo curve here, but it’s better
to click the Open in Edit Mode button.
That way, you will be able to see a scale at the left of the tempo graph, as well as a way to set the default tempo. Review the Editing Automation Data section of Automating Instrument and Effect Parameters. The tempo graph works the same way.
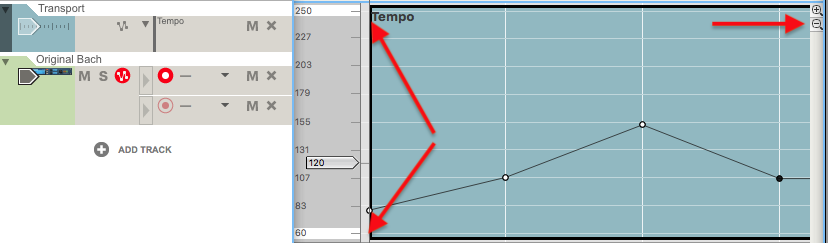
Use the + and - icons at the far right of the Tempo window to adjust the vertical resolution of the window.
- There is one difference between editing tempo automation and other kinds of automation. The vertical scale for tempo has adjustable limits. In the picture below, 250 BPM is the maximum tempo shown in the graph, and 60 BPM is the minimum. (Refer to the image above.) But you can double-click those and type new numbers to change these limits.
If you decide later not to have a tempo change after all, you can still leave the tempo data in your sequence, in case you change your mind again later. Just click the M (mute) button in the tempo lane so that it turns red. Then the sequence will use whatever constant tempo you type into the tempo field in the Transport Panel.
Time Signature Changes
Here’s how to enter time signature changes in Reason.
Think of this method as automating the time signature value (for example, 4/4, 3/4, etc.).
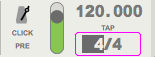
- Right-click or control-click on the time signature value
(for example, click on the first numeral). Two things happen:
the Time Signature value is then outlined in pink,
and the Transport track’s lane is now labeled “Time Signature.”

- Using the pencil tool, click in a measure of the time signature lane to create an empty clip.
- With the arrow tool, select the clip. Then choose a
new time signature from the popup menu at the top of the clip.
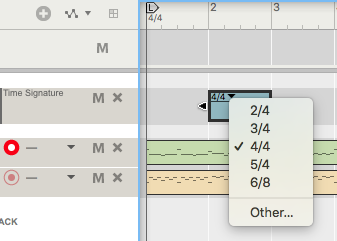
Notice how the ruler reflects the time signature change, which lasts only for the duration of the clip.
- You can expand the clip to make the new time signature span
multiple measures. When the clip ends, the sequence returns
to the default time signature: whatever you set in the
Transport Panel before you created the time signature lane.
Time signature clips must begin and end on measure boundaries. Otherwise, you can resize, copy, move, and delete them just as you would for note clips.
Note that changing the time signature for a sequence has no effect on the way the music sounds. It merely adjusts the way the notes align with beats and measures displayed in the Sequencer.