

Exercise A: A Basic Patch in VCV Rack
Installation
Download the version of VCV Rack for your computer here:
Be sure to download Rack 2 Free, not Rack 2 Pro, for your platform. Launch and click through the pages of the installer program you downloaded.
After installing, launch the VCV Rack 2 Free application.
We recommend that you choose Frame rate from the View menu, and set it to 30 Hz. (Even on macOS, this program’s menus are embedded in the window, not in the menu bar at the top of the screen.) The frame rate setting affects the graphics in the program, which can stress your video hardware in complex patches, especially without this change.
Starting From Scratch
When you launch VCV Rack the first time, you’ll see a set of modules patched together. We need to delete all these modules and start from scratch!
To delete a module, simply hover your cursor anywhere above a module, and press the delete key. (Weirdly, in VCV Rack, you don’t click on a module to select it first. But you can click outside of any module, and drag over one or more modules to select them, and then delete the modules.)
Adding Modules
To place a new module in the rack, right-click to invoke the module picker window, which shows the available modules in a grid. At the top of this window are controls that let you filter the list of modules to help you find the ones you’re interested in. You filter by Brand (who makes the module) and/or by Tag (the type of module). If you want to see all modules, click Reset filters.
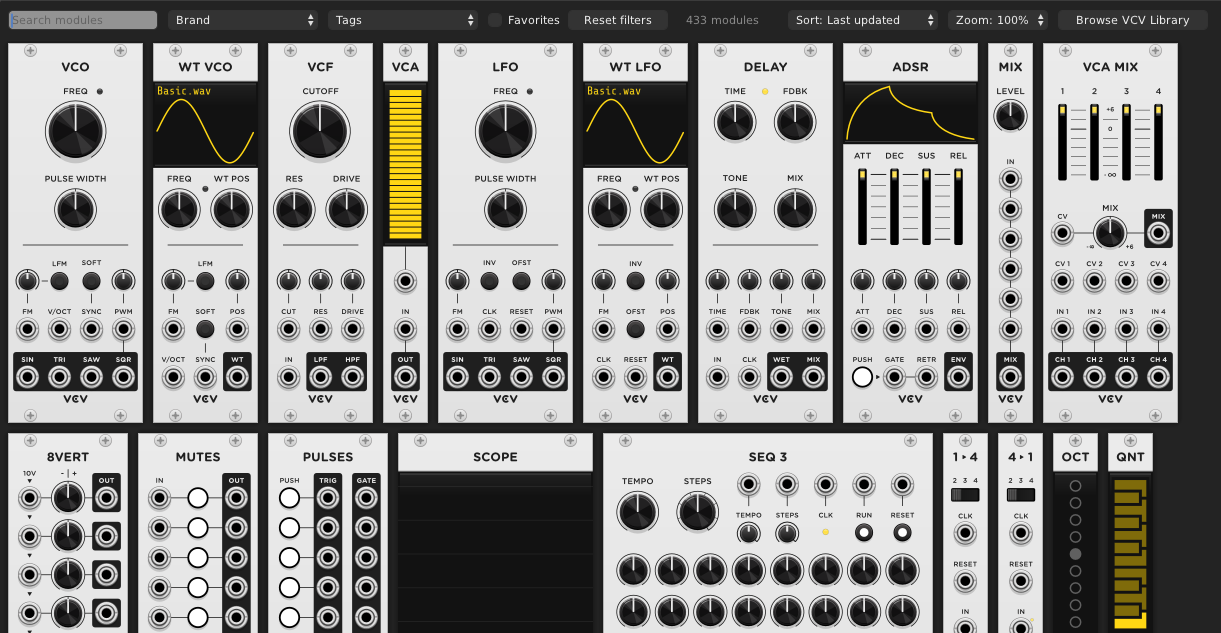
To choose a module, click its image. The picker window disappears, and the new module drops into your rack. The module names in the picker window might be too small to see, so a tooltip popup follows your mouse around. Pay attention to this to help you find what you’re looking for.
Input and Output Modules
You will need an Input module, which lets you route MIDI or the computer keyboard to other modules, and an Output module, which routes sound produced by the modules to your audio outputs.
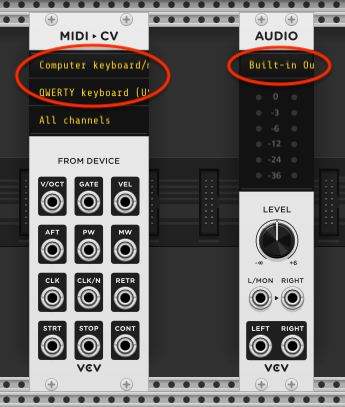
Right-click for the picker window, choose the External tag, and choose the MIDI-CV and AUDIO modules. You have to choose them one at a time, because the picker window vanishes after each choice.
Now you need to configure both of these modules.
- MIDI-CV - If you have a MIDI keyboard connected, you
can leave alone the top line of the text area in the module.
(In macOS this says “Core MIDI” by default.)
Click the second line to choose the keyboard or MIDI input
device you want to use.
If you don’t have a MIDI keyboard, choose “Computer keyboard/mouse” from the top menu, and then choose “QWERTY keyboard” from the second menu. This lets you play notes on your computer keyboard. You figure out how it works. (Hint: to change octaves, use the backtick (`) and 1 keys on the left side of your keyboard.)
- AUDIO - Choose the audio driver that’s right for you. If necessary, choose the sampling rate in the Engine menu.
After configuration, your modules might look like the ones shown here.
Constructing the Basic Patch
Recall that to make the basic patch, you need to route audio from an oscillator (VCO) through a filter (VCF) and then into an amplifier (VCA).
You control the oscillator with the MIDI-CV module and send the audio from the VCA into the AUDIO module. Although you can place the modules anywhere in the rack, it makes sense to assemble them in left-to-right order, from input to output.
Without installing other modules (see below), there aren’t many choices for VCO, VCF, and VCA. We suggest using VCA MIX as your VCA.
Patch your modules together by clicking on an output jack (with black background) and dragging to an input jack (without black background).
Then connect the keyboard control voltage from the MIDI-CV module (called V/OCT, meaning “volts per octave”) to the VCO. And connect the VCA MIX MIX output to the AUDIO L/MON input (for mono input).
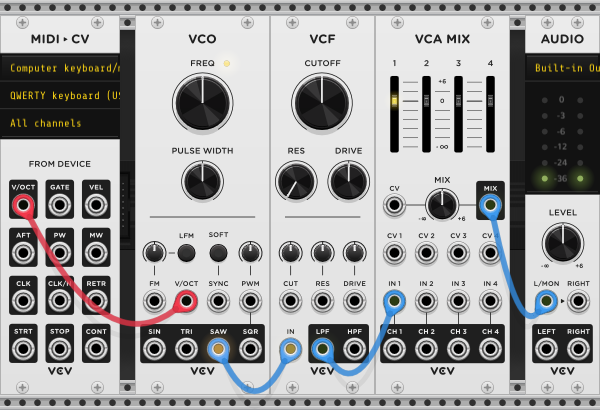
If using the LPF output of the VCF, remember to turn up the CUTOFF knob high enough to hear the oscillator waveform. This is the cutoff frequency, and it must be above the fundamental of the waveform the oscillator is playing.
Enveloping the Sound
Great, so this makes sound continuously. You can change pitch by playing different notes on your keyboard. But to create a sense of separately articulated notes, we need to envelope each of them. That means using an envelope generator to attenuate the signal between the note changes we want.
Signal comes out of ouputs, such as from the VCO, at full strength. We need to gate it to create a sense of separate notes. Do this with an ADSR envelope module triggered by the GATE signal from the MIDI-CV input module. The output of the ADSR module controls the VCA, because you’re modulating the amplifier gain with an envelope generator. So plug the output of the ADSR into the CV input of the mixer channel you’re using for the filtered oscillator signal.

(This picture shows only the gate and ADSR cv connections.)
Please don’t feel too frustrated if it doesn’t make sense. You’ll get the hang of it. Play around for a while, and if you get stuck, ask your instructors or colleagues for suggestions. You just have to dive in with this stuff.
Getting More Modules and Adding Reverb
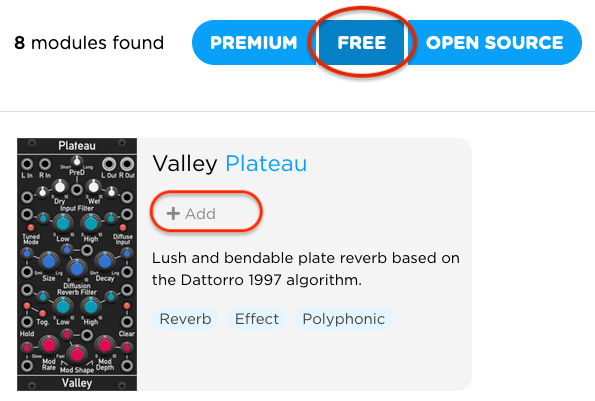
You can use just the modules that come with the VCV Rack installation, but it would be nice to extend it with some reverb or explore some other modules. There are many free modules to choose from. For reverb, I suggest Plateau by Valley.
To get additional modules, you need an account on the VCV Rack website. Once you have that, click the Library link at the top of the site window. Here you’ll find a searchable database of modules. Don’t buy any of them — at least not yet. Press the FREE button to filter out the ones that aren’t free. In the Brand popup, choose Valley, find the Plateau module, and press the “+ Add” link.
After getting new modules, you need to use the Library menu in VCV Rack to bring yourself up to date. After doing so, you must quit and relaunch the program.
Add Plateau to your patch, and see if you can figure out how to patch it into the signal flow. Think of it like an insert effect in a DAW. Where might that go? You want to generate a stereo signal coming out of the reverb and maintain that all the way to your headphones.
Submission
- Save your rack file to disk as “Exercise A.vcv,” and submit this in Canvas. Use the File > Save menu command in Rack to do this.
Grading Criteria
This assignment will be graded pass/fail. If it produces sound and reproduces the functionality of the basic patch, you pass. You may ask for help with it during tutorial before submitting it on Thursday night.